Intro to Git and Github

Introduction
Git and Github are the most essential tools in a developer’s arsenal. Git allows you to track every change you’ve made in the codebase while Github simplifies project management and collaboration.
People who are new in programming often get confused by the difference between Git and Github. A common misconception is that these tools do the same thing. To add up to the confusion, many software developers often interchange Git and Github in conversations even if each tool serves a different purpose. So why are they often mentioned together and what makes them so similar?
Table of Contents
- What is Git
- What is Github
- Create a Github Account
- Git Installation
- Git Configuration
- Create a Github Repository
What is Git?
Git is a version control system created by Linus Torvalds. A version control system records all the changes made to a set of files. By doing so, it enables us to track and manage the changes made to these files. Since Git keeps track of a certain file’s full history, it can be used to recall older versions of the code or it can be used to restore the older version of a file. One thing to keep in mind is that Git is installed in a local machine. Therefore, once the hard drive in a local machine fails, all the files and its recorded changes are lost. This limitation can be solved by using a Git hosting service like Github.
What is Github?
Github is a cloud-based hosting service that makes it easy to manage Git repositories. By uploading the files tracked by Git to the cloud, you don’t have to worry about losing any file when your hard drive fails. Another advantage Github provides is ease of collaboration. Once a fellow developer is finished with his work, he can make a pull request or push a commit to update the codebase with his changes.
Create a Github Account
To get started using Github, we have to create an account. Head on over to https://github.com/signup and enter your desired username, email, and password. After that, you’ll be greeted with a welcome page.
Git Installation
Windows
We can install Git in Windows by downloading the installer from their website. Once you're greeted by the installer, you might get overwhelmed by the amount of customizable settings. Don't worry about this :) The default settings are good! Just keep on clicking next until Git is installed.
Mac
It’s best to install Git using a package manager like brew. To install brew, run the following command:
/bin/bash -c "$(curl -fsSL https://raw.githubusercontent.com/Homebrew/install/HEAD/install.sh)"
After installing brew, installing Git is as easy as running:
brew install git
Linux
It's very convenient to install Git in Linux. Depending on your Linux distribution, you’d have to run different commands:
Debian-based distros (Ubuntu)
sudo apt update && sudo apt install git
Fedora-based distros
sudo dnf -y update && sudo dnf -y install git
Arch-based distros (Manjaro)
sudo pacman -Sy install git
Git Configuration
In order to use Git, you need to set a name and email:
git config --global user.name “ReplaceMeWithYourGithubUsername”
We should use the private email provided by Github when setting the email. You can find your private email by going to your email settings. (The highlighted text is the private email.)

git config --global user.email “ReplaceMeWithYourPrivateGithubEmail”
Create a Github Repository
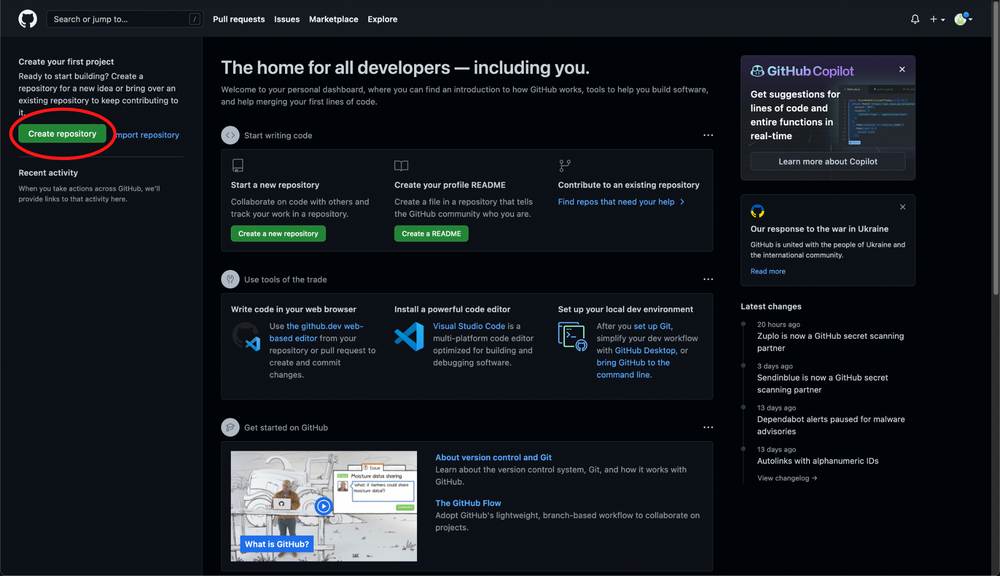
To create a Github repository, head on over to Github and click on the "Create Repository" button.
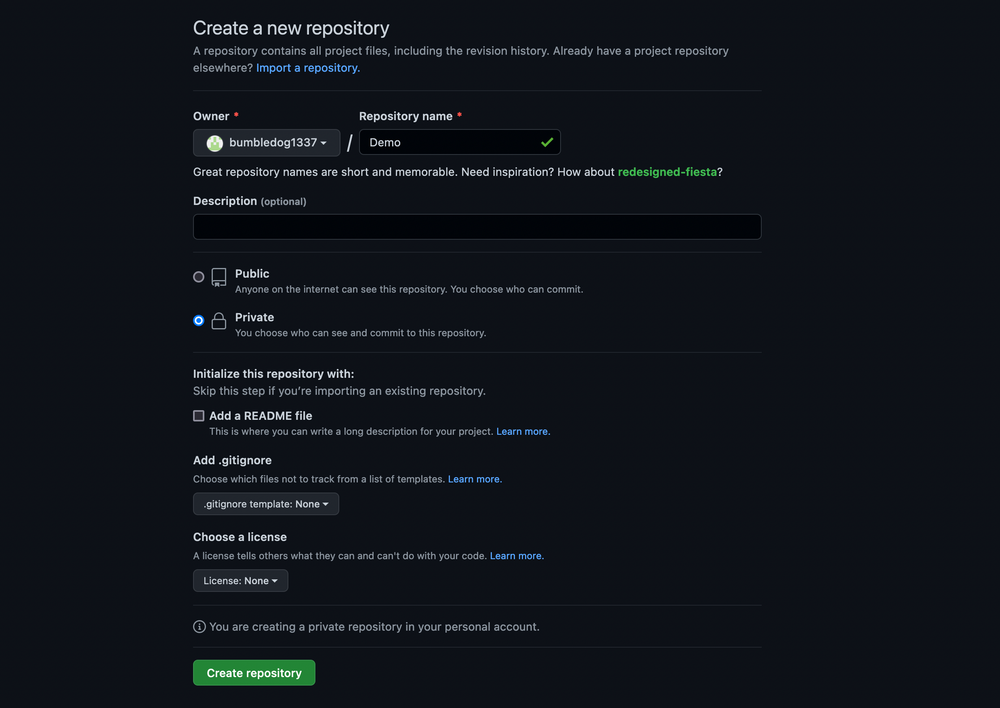
You can set any name for the repository and set the repository's visibility to public or private - these settings are up to you.
Once you've created the Github repository, you'll be greeted by a getting started page. This quick setup page can seem quite intimidating at first - but don't worry! All you have to do is copy the lines of code under the "...or create a new repository on the command line" section.
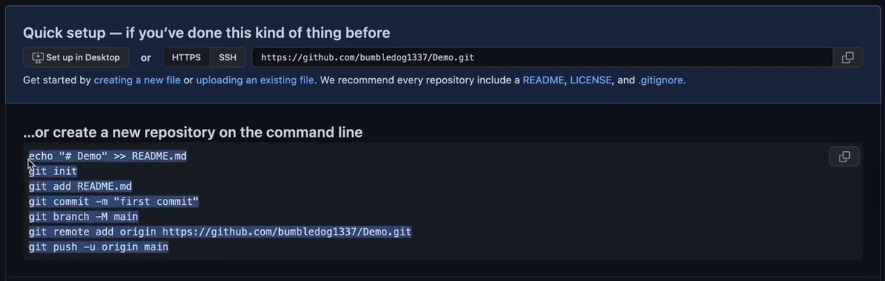
After copying, open your code editor. In my case, it is Visual Studio Code. Open a folder if you haven't already and open the terminal in the same directory as the folder. (In VS Code, this can be done by opening a folder and clicking on Terminal > New Terminal in the menu bar.) Paste the copied lines of code and hit enter.

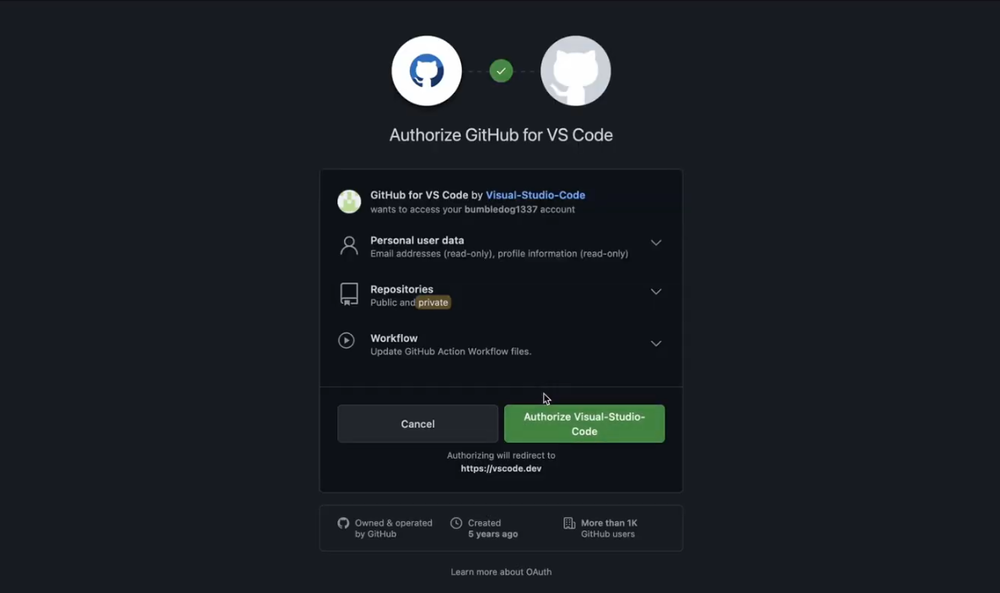
Your code editor will ask you to if they can sign in using Github. Click on allow and authorize it's sign in.
You'll be redirected to your code editor and congratulations! You've successfully configured Git and Github. Looking forward to your journey as a software engineer.