Hosting a Web Server using AWS EC2 (Part 1)


Hosting a web server might be daunting at first; however, it isn't as complicated as you would think. To get started, you actually don't have to manage physical servers yourself. We could use a cloud provider to do it for us. In our case, we will be using AWS, a cloud provider managed by Amazon.
Behind the Scenes
Let's start by understanding how web hosting works. To do so, I highly recommend reading this AWS resource and watching the video below:
Creating an AWS Account
For part 1, we will be setting up the server. For part 2, we will do additional server setup and use Cloudflare as our DNS and CDN to route requests from our domain to our server.
We will be using an AWS service called EC2 . It allows you to provision virtual machines called instances. To simplify things, you can imagine that a virtual machine is like a computer that has its compute resources set in advanced. (Its storage, memory, and amount of cpu cores are configured). Virtual machines enable you to split a powerful computer and turn it into many small computers by dividing its compute resources.
Instances come in many types and sizes. (Learn more about them here.) The one we will be using is a t2.micro or t3.micro instance. Let's start by creating an AWS account. Take Note: They will ask you for your credit or debit card details. Luckily, using a virtual card could sometimes work. If you're from the Philippines, you can easily create and use GCash or PayMaya's virtual cards for free.
Visit the AWS website and click on the "Get Started for Free" or "Create an AWS Account" button.
While creating your account, I highly recommend following this video tutorial:
Creating the EC2 Instance
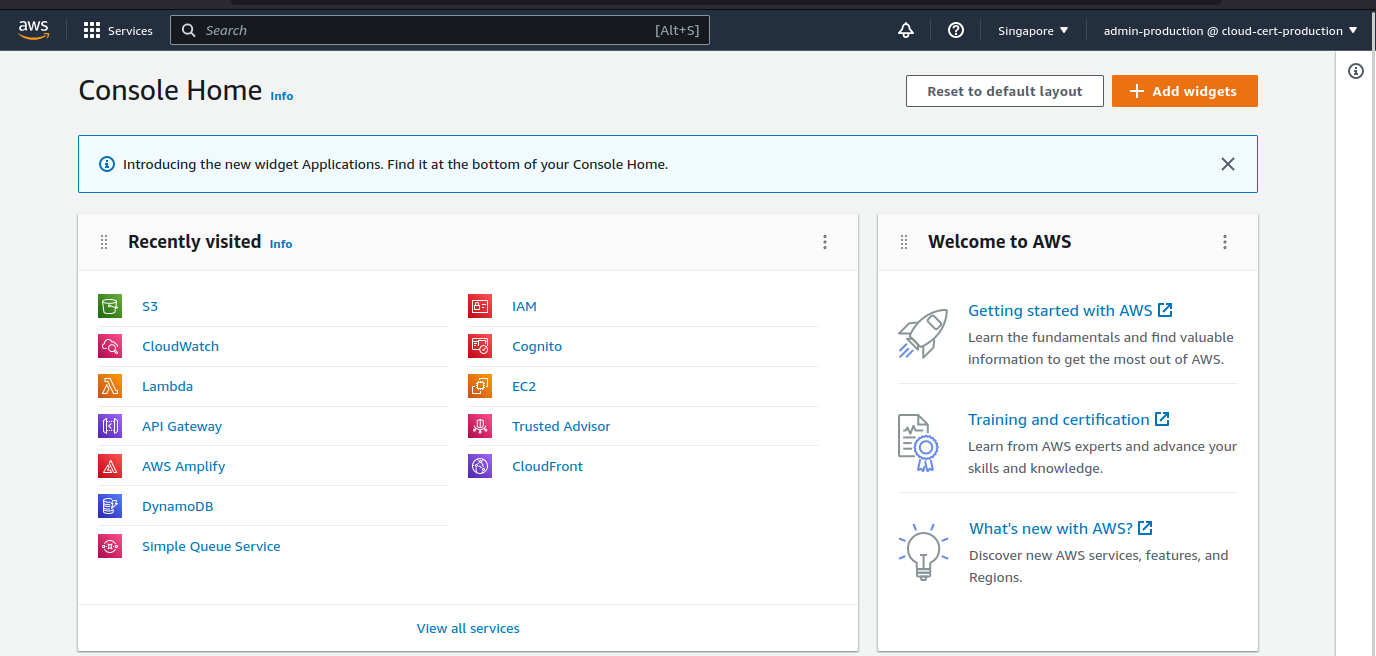
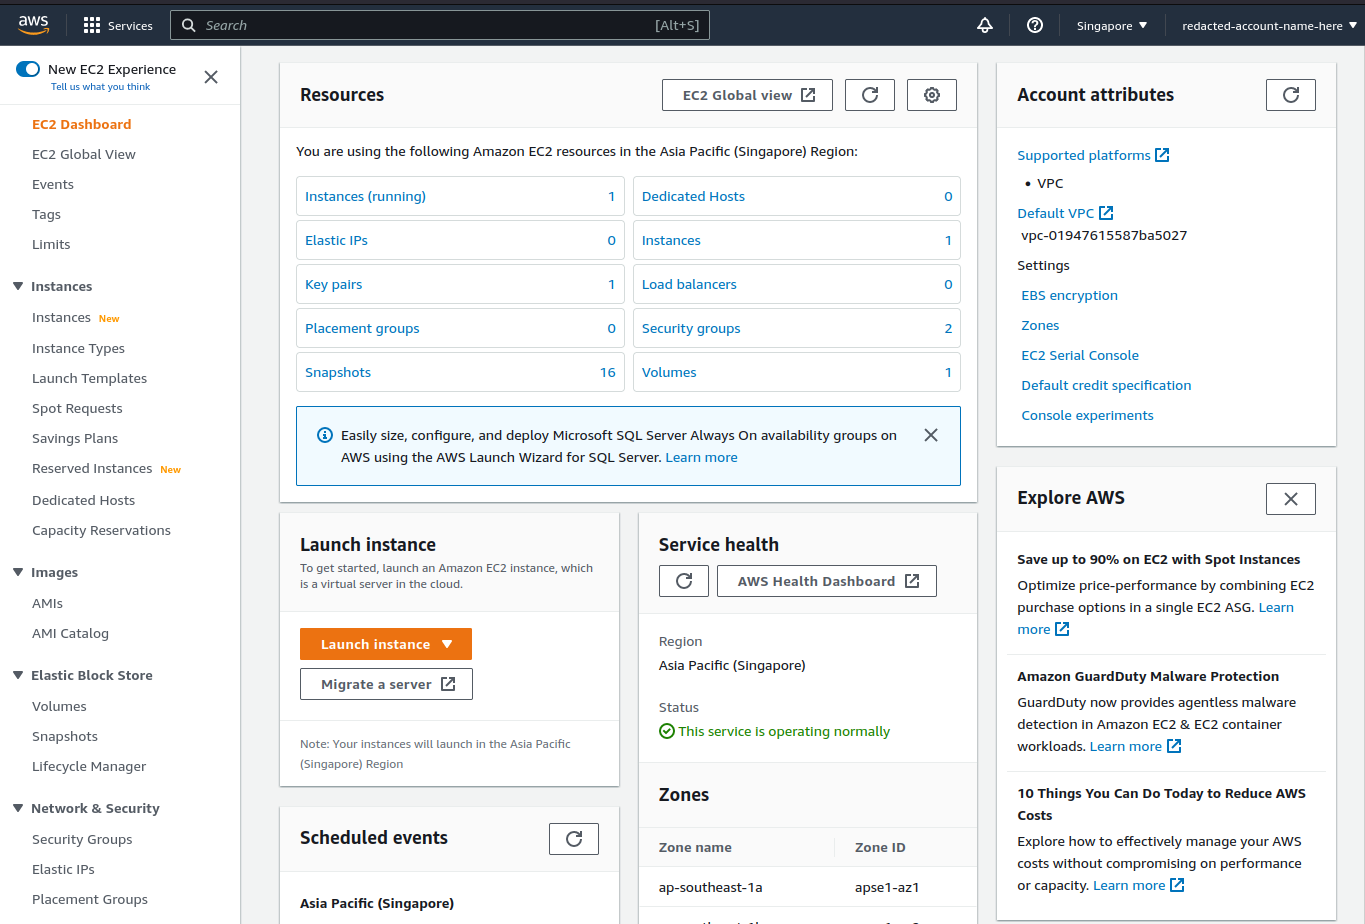
Once you've created your account, head on over to the AWS Console.
Click on the search box above and search for EC2.
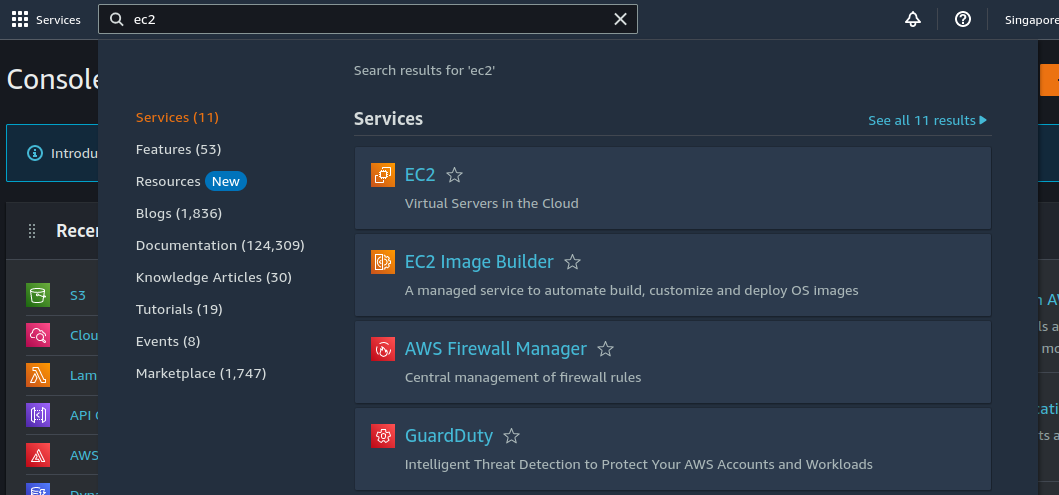
Click on the EC2 link and you'll be greeted by the EC2 console.
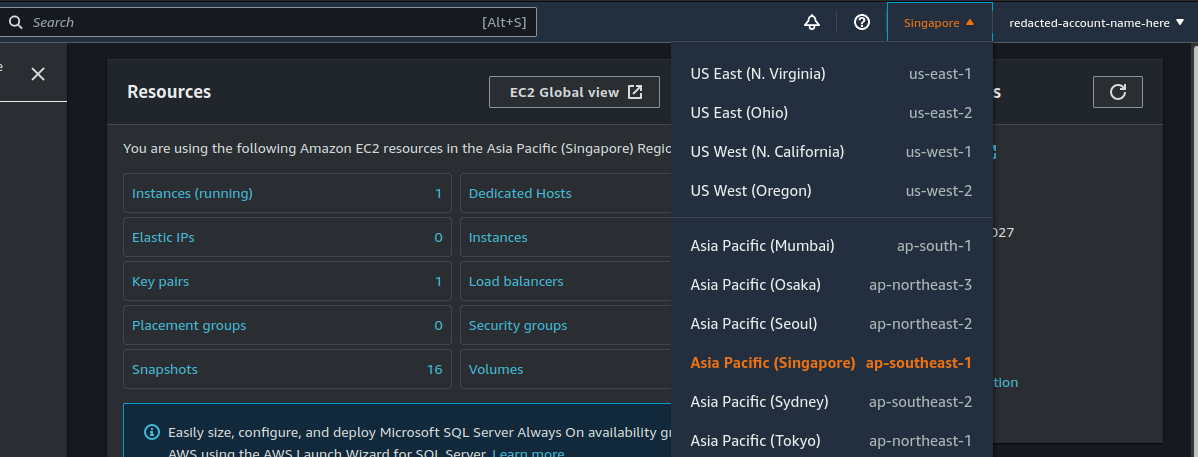
Before creating an EC2 instance, let's set the region where we want to create the instance in. We want to create the instance at the region that's closest to you to reduce latency. You can change the region by clicking on the country dropdown on the top-right side of the page.
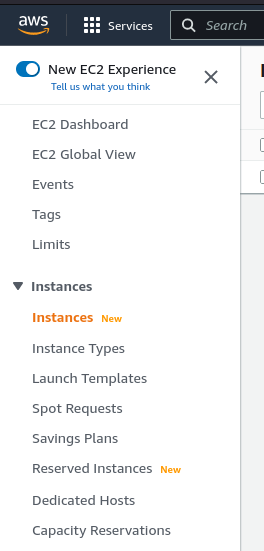
To create an EC2 instance, click on the "Instances" text at the left sidebar.
After that, click on the "Launch instances" button at the top-right side of the dashboard.
Once you're in the launch instance page, set name of the instance (You can choose any name). Under "Application and OS Images (Amazon Machine Image)", select Ubuntu as your operating system.
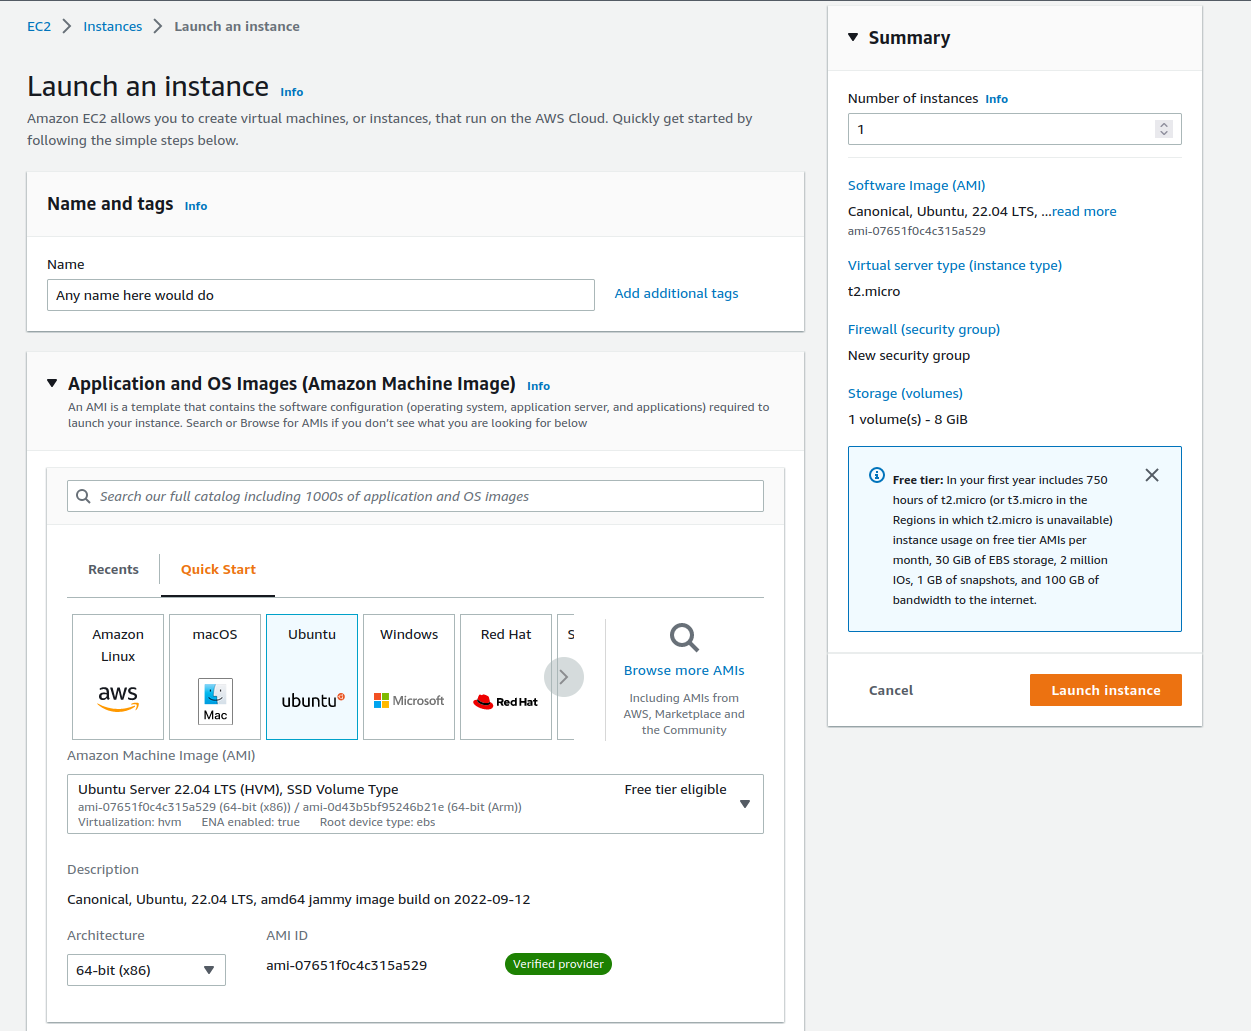
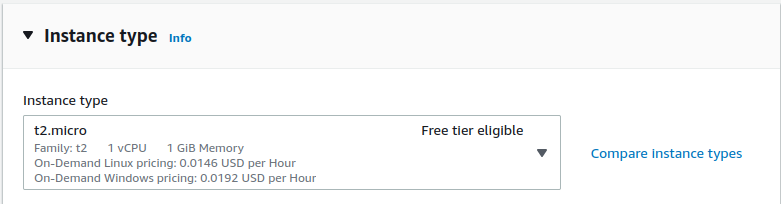
Scroll down and select a "Free Tier Eligible" instance type. To be safe, make sure that t2.micro is selected. (Side note: The free tier allows you have t2.micro instances running for 750 hours per month. If you only have one instance running, the free tier has you covered.)
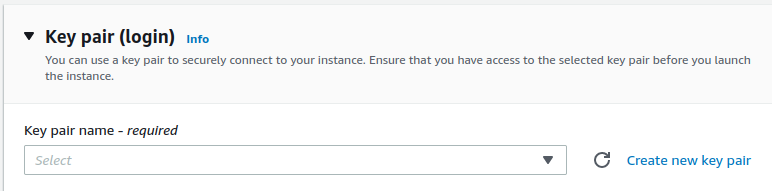
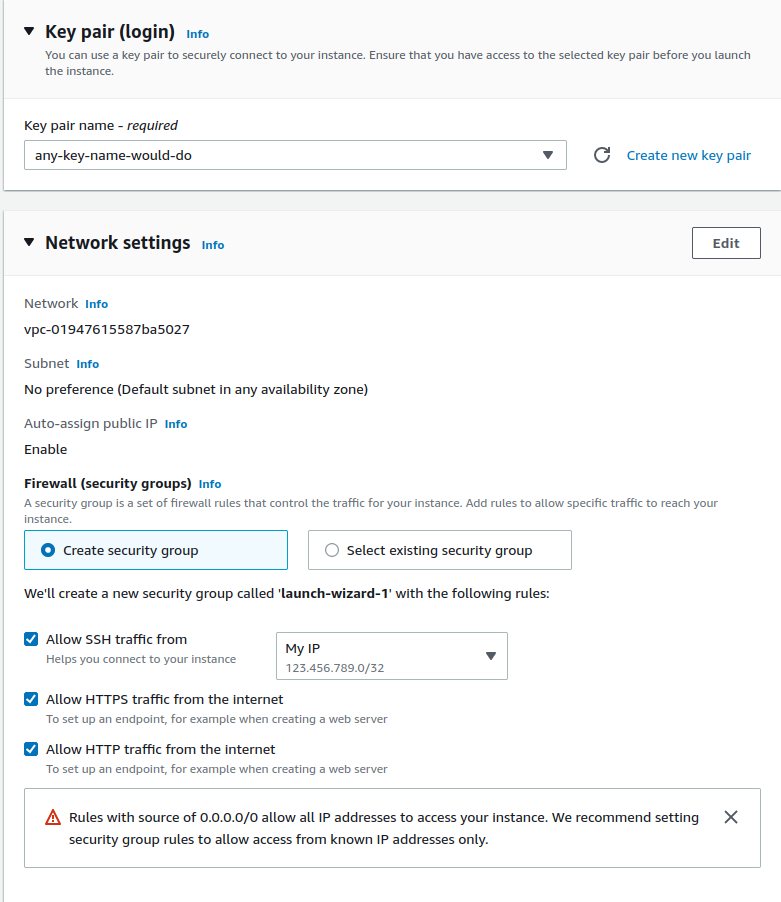
To connect to your EC2 instance, you need to generate a key pair. Think of it as a password that you use to authenticate to the server. Click on "Create new key pair" to generate a new one.
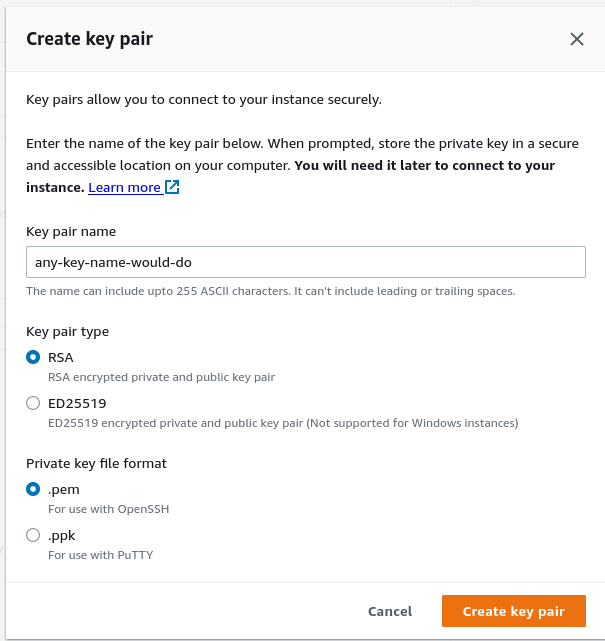
Set the key pair name and click on "Create Key pair". The key pair, a .pem file, will be downloaded. Make sure to not to lose it. In my case, I'm storing the key file in my Documents folder.
Select the new key pair name. In Network settings, allow ssh traffic from your IP only. Click on the "Anywhere" dropdown and select "My IP".
Take Note: If you're using a residential network, your IP address constantly changes after some time. You would have to reconfigure the security group to allow connections from your new IP address. The steps to do this will be at the bottom of this article.
After allowing traffic from your IP only, allow HTTPS and HTTP traffic from the internet.
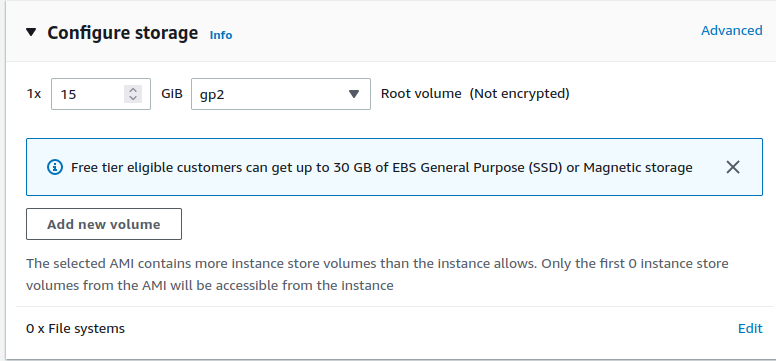
The last thing we have to do is configure storage settings. To stay within the free tier, EBS allows you to use up to 30 GB of storage. In this tutorial, let's attach a 15 GB storage. If more storage is needed, we can always attach more block devices.
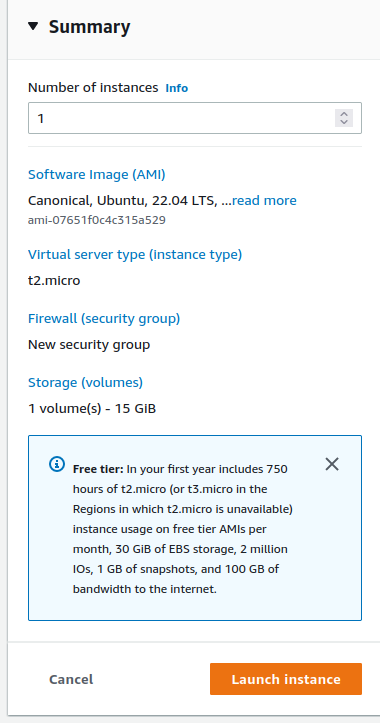
Once you're done, review the details and launch the instance.
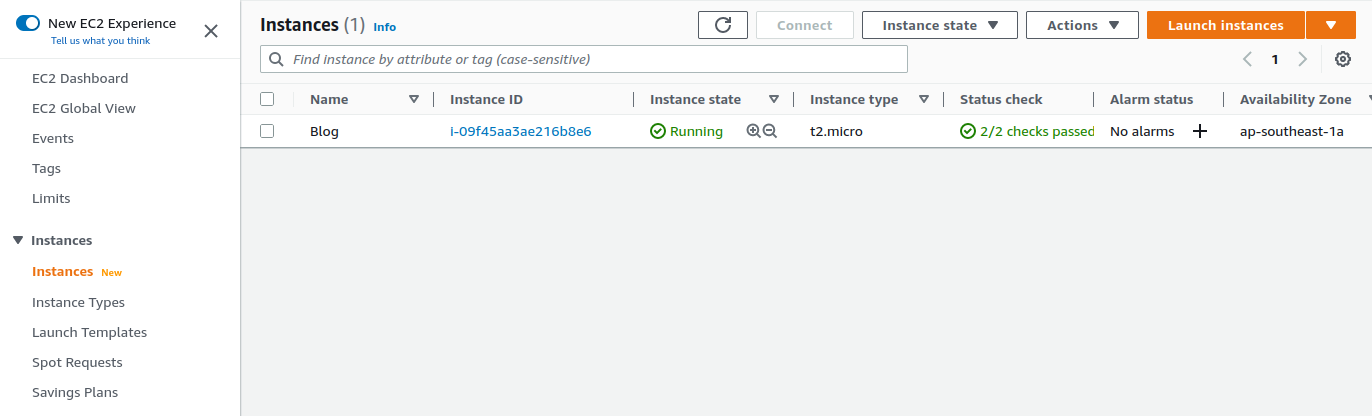
Once the instance has successfully launched, you should see the following screen. Click on "View all instances".

You will see your instance being provisioned. It will take a few minutes for it to be available. Once the Instance State is Running and the Status check has 2/2 checks passed, the instance is ready for use.

Connecting to the EC2 Instance
To connect to an EC2 instance, we have to use a communication protocol called SSH. If you'd like to learn more about SSH, I highly recommend watching this video.
Let's start connecting to the the EC2 instance. Select the instance you've created by clicking on the checkbox and click on the "Connect" button on the top-right corner.

Select "SSH client" and you will see a few instructions on how to connect to the instance.

If all of this is new to you, I recommend learning how to use the change directory (cd command) first through the following video (The cd command works in Windows, MacOS, and Linux.) We will be using the cd command to reference the .pem key file you've downloaded a while ago.
The steps that you have to follow to ssh to your server depends on your operating system. I recommend watching the following tutorials depending on your OS.
Windows
MacOS or Linux
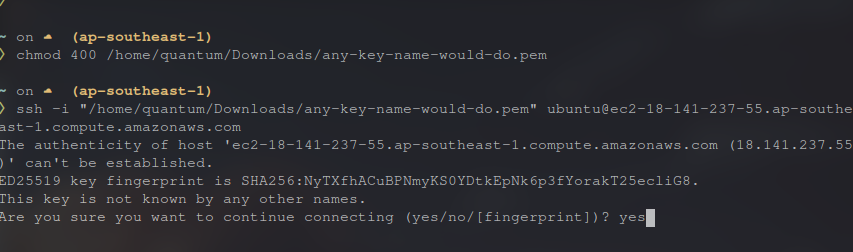
Follow the instructions in the video above for Windows, but for Mac and Linux computers, you have to run the follwing commands in the terminal:
chmod 400 ~/Documents/replace_with_your_key_file_name.pem

ssh -i "~/Documents/replace_with_your_key_file_name.pem" [email protected]
Take Note: In the commands above replace ~/Documents/replace_with_your_key_file_name.pem with the directory you've stored your key file in. Also replace ec2-18-141-237-55.ap-southeast-1.compute.amazonaws.com with your instance Public DNS. The public DNS can be found in #4 of connect instance page.

Once you've entered the commands, you will be asked if you want to connect to the instance. Type yes and hit enter.
You will then be greeted by the following page.
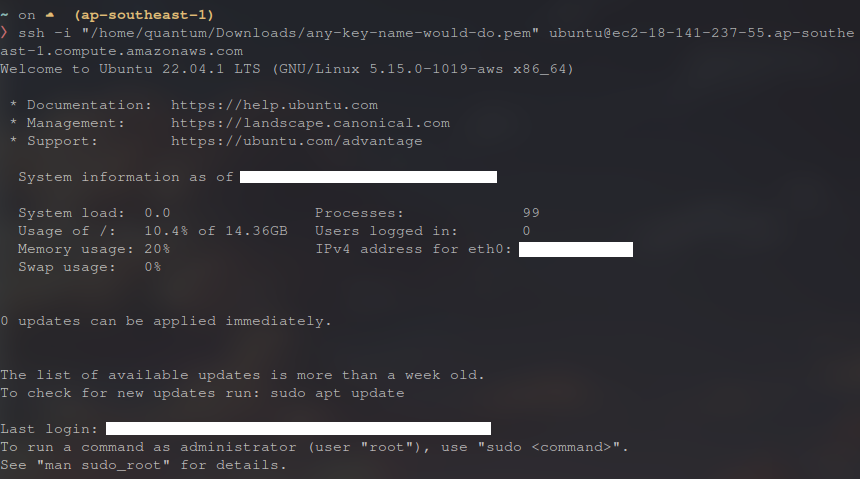
Take Note: You will be managing the server through the CLI by typing commands. There is no GUI because having a GUI displayed to you consumes server compute resources. Although the 1GB ram and 1vCPU core of the t2.micro instance is enough for serving low to medium web traffic, having a GUI displayed will take almost all the resources, leaving little to no resources for serving web traffic.
Securing the EC2 Instance
Securing your EC2 instance is very important. We have to update the Ubuntu server to its latest version first.
sudo apt update && sudo apt upgradeAnother thing we have to do is to ban malicious entities trying to bruteforce their way in to the server. We can use CrowdSec to do so. Let's install CrowdSec by typing the following commands:
curl -s https://packagecloud.io/install/repositories/crowdsec/crowdsec/script.deb.sh | sudo bash
sudo apt install crowdsec
sudo apt install crowdsec-firewall-bouncer-iptables
Once it's installed, we have to start CrowdSec using the following command:
sudo systemctl enable --now crowdsec.serviceOptional: If you'd like to further secure your server, I highly recommend reading the following article. I also recommend changing your SSH port from 22 to something else and don't forget to go to your inbound rules (see below in conclusion) and change the Type from SSH to Custom TCP as well as change port 22 to the port you've set.
Conclusion
That's it for part 1. I hope you were able to easily create your own EC2 instance. In part 2, we will be setting up our server to serve requests from the internet.
Take Note: After some time, there is a chance that you won't be able to connect to your server through ssh. (Your ssh command will timeout) It's because your public IP address changes from time to time if you're using a residential network. If this happens, try the following:
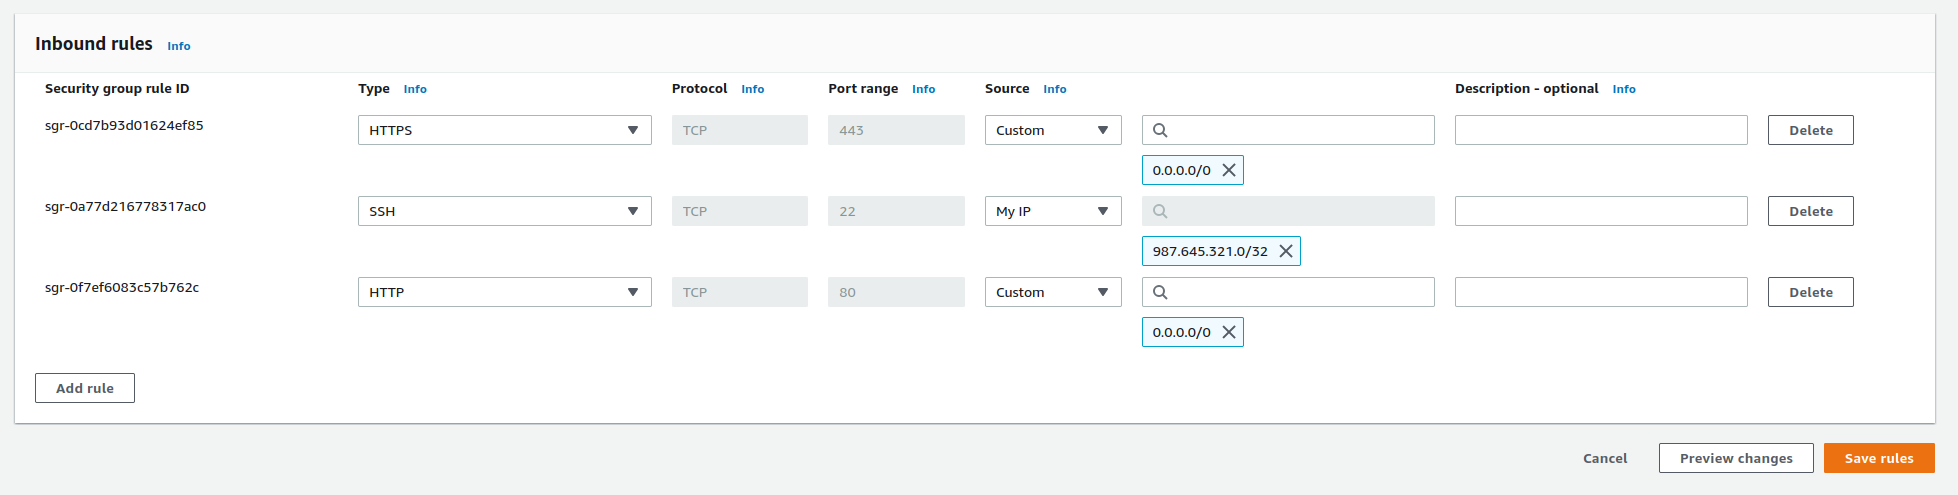
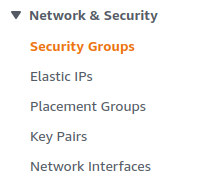
In the EC2 console, under "Network and Security", click on Security groups.
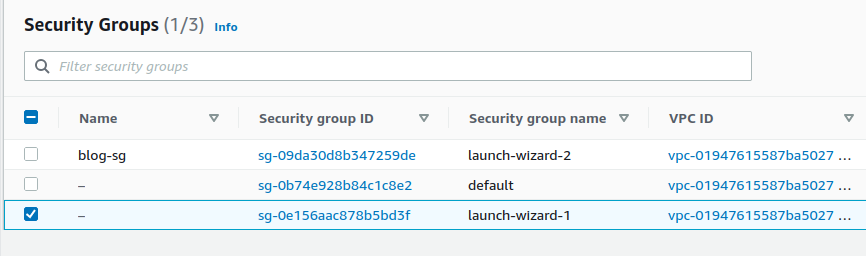
Select the security group of your EC2 instance.
On the dashboard below, select "Inbound rules" and select the rule with the "Port Range" 22 then click on "Edit inbound rules".
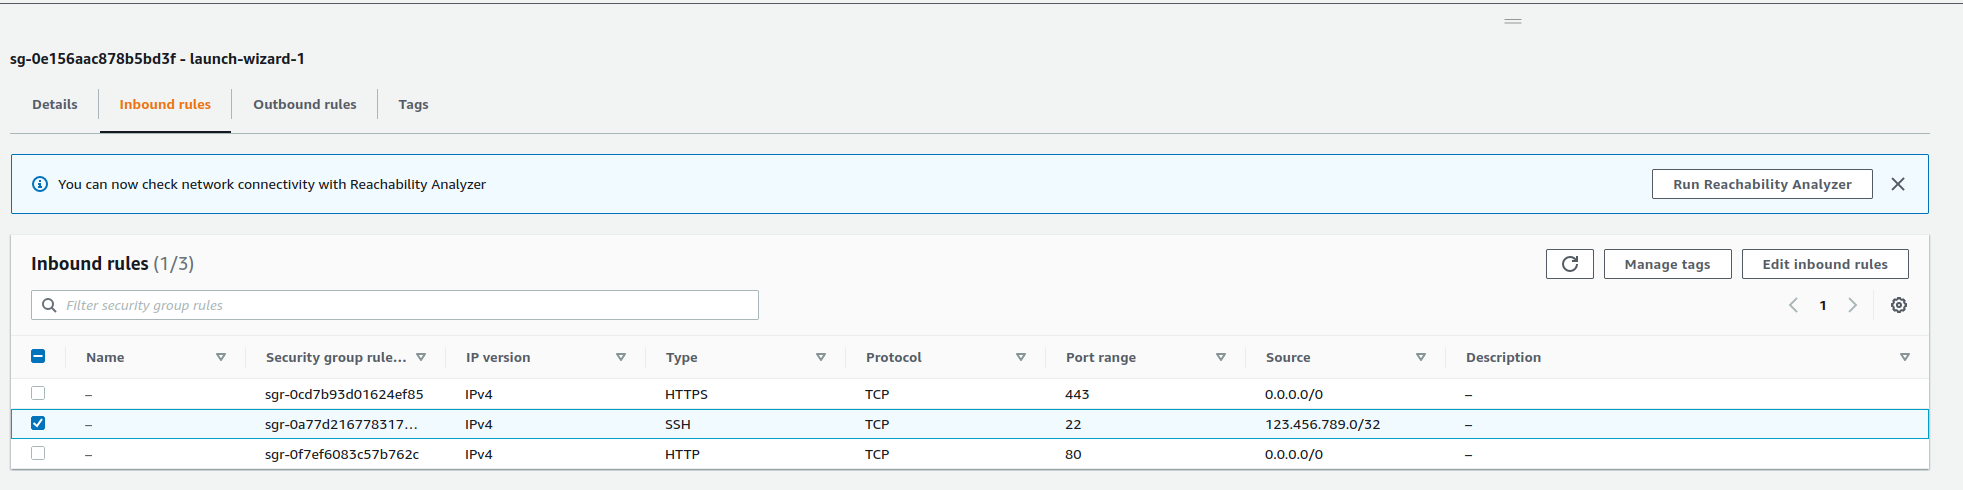
Remove your current IP address by clicking on the "X" button beside your IP address (123.456.789.0/32 in my case) and add your IP by clicking on "Custom" then select "My IP". After that, click "Save rules".